How To Sharpen A Hedge Trimmer

A dull hedge trimmer is a dangerous garden tool. Not only will it make your job more difficult, but it can also cause harm to both you and your plants. Luckily, sharpening your hedge trimmer is a relatively easy process that only takes a few minutes.


How can I tell if my hedge trimmer needs sharpening?

There are a few telltale signs to look out for.

  1. Take a close look at the blades. If they are starting to look dull or jagged, then it’s time to sharpen them.
  2. Pay attention to how the trimmer feels when you’re using it. If it feels like it’s stuck in one spot or the blades are catching on the branches, then it’s time to sharpen the cutting edge.
  3. Listen to the trimmer as you use it. If it starts to make a grinding noise, that’s a sure sign that the hedge trimmer blade needs to be sharpened.


How often do I need to sharpen hedge trimmer blades?

The frequency with which you need to sharpen your hedge trimmer blades will depend on how often you use it. If you use your hedge trimmer once a week, you can probably get away with sharpening the blades once every couple of months. However, if you use your hedge trimmer multiple times a week, you’ll need to sharpen the blades more frequently.


Instructions for sharpening a hedge trimmer

There are two ways to sharpen hedge trimmer blades: manually or with a power grinder. We’ll walk you through both methods so that you can choose the option that’s right for you.


How to sharpen a hedge trimmer manually

If you don’t mind getting your hands dirty, sharpening your hedge trimmer blades manually is a relatively easy process. 

You’ll need a flat file or sharpening stone, gloves, safety goggles, a soft cloth and a vice to hold the blade in place.

  1. Put on your work gloves and safety goggles.
  2. Unscrew the blade guard and remove the dull blades from the hedge trimmer.
  3. Clamp the blade in a vice. If you don’t have a vice, you can wrap the blade in a thick towel before clamping it down to protect it from damage.
  4. Use a flat file or sharpening stone to sharpen the blade by running it along the length of the blade. The recommended sharpening angle is at 30-degrees.
  5. Be sure to sharpen both sides of the blade evenly at the right cutting angle.
  6. Wipe off any debris from the sharp blades with a clean cloth before reattaching it to the hedge trimmer.
  7. Screw on the blade guard and give the hedge trimmer a test run to make sure everything is working correctly.


How to sharpen hedge trimmer blades with a power grinder

tool shed with hedge trimmer on the table

If you’d prefer not to spend time manually sharpening your blades, you can use a power grinder to get the job done quickly and easily. 

You’ll need a power grinder fitted with a metal grinding disc, safety gear, and a vice (or thick towel) to hold the blade in place.

  1. Wear safety glasses and put on your gloves.
  2. Unscrew the blade guard and remove the dull blades from the hedge trimmer.
  3. Clamp the blade in a vice (or wrap it in a towel).
  4. Holding the power grinder firmly in both hands, slowly run the grinding disc along each cutting edge of the blade at a 30-degree angle until it is nice and sharp.
  5. Be careful not to overheat the metal by grinding for too long in one spot — keep moving until you finish sharpening the entire blade.
  6. Wipe off any debris from the sharpened blade with a clean, soft cloth before reattaching it to the hedge trimmer.
  7. Screw on the blade guard and give the hedge trimmer a test run to ensure a consistent cutting performance.


How to sharpen an electric hedge trimmer

  1. Unplug your electric hedge trimmer or remove its battery pack. Under no circumstances should you attempt to handle its blades while it’s still connected to a power source.
  2. Put on your safety glasses and work gloves.
  3. Use the handle of a screwdriver, or any rubber handheld tool, to line up the hedge trimmer teeth. This gives you the most surface to sharpen.
  4. Unscrew the blade guard and remove the dull blades from the hedge trimmer. 
  5. If you have more experience manoeuvring power tools, follow steps 3 to 7 under “How to sharpen hedge trimmer blades with a power grinder”. But if you’re quite new or would like to try manually sharpening your blades, you can follow steps 3 to 7 for sharpening trimmer blades manually.


How to sharpen a hedge trimmer using Dremel

Dremel tool

Dremel is a popular brand for a handheld, electric rotary tool. It’s commonly used to cut, polish, grind and sharpen various objects.

  1. Start by removing the blade guard from your hedge trimmer.
  2. Use a Dremel tool with a grinding attachment to start sharpening the tips of the blades. Be sure not to grind too much, as this can damage the blades.
  3. Carefully hold the Dremel grinding attachment against the edge of the blade, moving it back and forth until the blade is sharp. Use the flat grinding attachment, not the bullet-shaped tip because this will catch on the bevelled edge.
  4. After grinding, use a sharpening stone or Dremel filing attachment to file down any rough edges.
  5. If you’re using a sharpening stone, start with a coarse stone and switch to a finer one until the blades are nice and sharp.
  6. Replace the blade guard, and you’re ready to go.


Hedge Trimmer Maintenance

Hedge trimmer blades aren’t the only parts of the tool that need maintenance to work their best. Here are a few tips on how to keep your hedge trimmer in tip-top shape.


How to clean hedge trimmer teeth

sharp steel blades of a small cordless electric hedge trimmer cutting

Over time, any good tool can become clogged with dirt and debris, rendering your hedge trimmer unusable. It’s important to clean the blades regularly to keep your hedge trimmer in top condition. 

Here’s how to clean hedge trimmer blades:

  1. Remove any loose dirt and debris from the teeth using a soft brush.
  2. Mix a solution of equal parts water and white vinegar, and soak the blades for about 30 minutes.
  3. After soaking, use a toothbrush or small brush to scrub away any remaining dirt and debris.
  4. Rinse the blades thoroughly with water to remove any residue.
  5. Wipe it dry with a clean, soft cloth.
  6. Lubricate the hedge trimmer blades with a thin film of WD-40 or multipurpose oil to keep them from drying out and dulling over time.


How to fit the hedge trimmer blades

  1. Start by removing the blade cover from the hedge trimmer. This will expose the blade-holding mechanism.
  2. Take the hedge trimmer blade and align it with the slots in the holding mechanism. Make sure that the teeth on the blade are facing in the correct direction.
  3. Once the blade is aligned, push it into the slots until it is firmly in place.
  4. Replace the blade cover and screw it back into place.


How to align upper and lower hedge trimmer blades

electric hedge trimmer blade

If your hedge trimmer isn’t cutting as well as it used to, it might be time to align the upper and lower blades. This is a quick and easy fix that anyone can do at home, and it will help to ensure that your trimmer is cutting cleanly and efficiently. 

Here’s how to do it:

  1. Start by removing the blade guard.
  2. Loosen the nuts that hold the upper and lower blades in place.
  3. Adjust the alignment of the blades so that they are parallel to each other.
  4. Once the blades are aligned, tighten the nuts back into place and reattach the blade guard.


Give your garden the cutting edge care it deserves

Hedge trimming is essential to keeping your garden looking neat all year round if your hedge trimmer is in good condition. Fortunately, sharpening hedge trimmers isn’t difficult — it just takes patience and some elbow grease (or a power grinder). If you need help sharpening your hedge trimmer or trimming your hedges, give us a call and our expert gardeners will give your hedges the care they deserve.

The post How To Sharpen A Hedge Trimmer appeared first on Lawn.com.au.

Growing Lavender In Australia

One of the best plants to grow in your garden is lavender! The scent is heavenly, the flower spikes are gorgeous, and the plant itself is excellent for practical use. Best of all, it’s very adaptable – so you can grow lavender from seeds, cuttings, or plants.

Even just one lavender plant can make a difference in your home. And it’s easy to grow lavender successfully! The plants prefer warm, temperate climates, full sun, and well-drained soil. Prune them regularly to encourage new growth. And don’t worry if you forget to water them – they’re very drought-tolerant once matured.

Lavender is excellent for a garden, and not just for its medicinal properties. Brighten up your yard – and even encourage butterflies! – by growing lavender plants.


About The Lavender Plant

Lavandula spp. is a hardy, perennial semi-shrub. It thrives in warm climates, since it is believed that it originated from the Mediterranean and the Middle East. A part of the mint family, this flowering plant has a reputation for its gorgeous scent, grey-green foliage, and lilac flower buds.

Lavender has several uses, including:

  • Floral arrangements
  • Companion plants
  • Herb garden
  • Potpourri
  • DIY personal care (essential oil, salt scrub, etc.)
  • Accents for food

The plant usually blooms in early summer, although some varieties can flower in late spring or late summer.


Types of Lavender To Grow In Australia

There are several varieties of lavender, with different levels of hardiness and colour. Some can tolerate cold areas better than others. Each variety blooms at a different time, so keep that in mind before planting!


English lavender

lavender (Lavandula angustifolia)

Lavandula angustifolia

This is the most versatile and long-lived lavender species. With good care, it can keep up to 25 years! Also known as ‘true lavender’, the compact lilac flowers of English lavender appear in late spring and can bloom more than once.


Hybrid lavender

Lavandin x intermedia

The hybrid has longer and more slender flowers, with upright flower spikes that branch out from the centre. It is a late bloomer, emerging from mid to late summer, and has paler colours than ‘true lavender’ plants.


Spanish lavender

Spanish lavender

Lavandula stoechas

This kind of plant is more short-lived than other varieties. It has a lifespan of only 3–5 years, and is much more delicate. The small flowers emerge in early spring, but they regrow fast after trimming.


Portuguese lavender

Portuguese lavender

Lavandula latifolia

This is a popular culinary herb that also works when making dried flowers. It’s very fragrant and showy, and can grow even in coastal areas. You can propagate Portuguese lavender from softwood cuttings. It blooms from late spring to early summer.


Fringed lavender (or French lavender)

French lavender

Lavandula dentata

You’ll know fringed lavender by its textured foliage, which bursts into bloom during late spring into summer. It’s winter-hardy, able to tolerate up to -7ºC, but can also endure heat and drought. French lavender is particularly popular for potpourri and cut flowers.


Growing Lavender Plants

Keep these growing conditions in mind regarding where to plant and what kind of soil to use. Assess your garden to ensure you plant lavender somewhere it will thrive!


Climate for lavender

The plant thrives in warm climates – so hot, dry summers and cool winters. English lavender doesn’t tolerate humidity, while Spanish, hybrid, and Italian lavender can grow in mild humid climates.


Where to position lavender

lavender garden for home countryside

Grow lavender somewhere with full sun – at least six hours a day, preferably afternoon sun. It also tolerates partial shade, so it works as groundcover or accent plants.

Wherever you plant it, ensure there is good air circulation without strong winds.


Soil for lavender

Your lavender plants will grow best in well-draining soil. Avoid clay soils since these retain too much moisture, which could cause root rot. For soil pH, go for slightly alkaline – lavender doesn’t do well in ground that’s too acidic.

If your garden soil has poor drainage, consider raised beds or potted plants! Choose a high-quality potting mix and keep plants in a sunny location. Ensure the pot has enough drainage holes so the soil doesn’t get waterlogged.


How To Plant Lavender In Australia

You can grow lavender in three ways:

  • From seed
  • Propagation
  • Established plants

Any of these methods are simple enough, so choose which works best for you and go grow!


1. How to grow lavender from seeds

lavender seed and seedling

To plant lavender from seed, you’ll need:

  • A seed tray or pot
  • Potting mix
  • Lavender seeds

Start by filling the trays or pots with your potting soil. Sprinkle the seeds onto the mix. Cover with soil and firm it down (carefully!).

Water the soil to keep it moist, so the seeds don’t dry out.

Leave the tray somewhere it gets full sun while the seeds germinate. Once they emerge, let them grow until they reach 7.0cm. Once they reach this height, they’re ready for transplanting.

Plant the seedlings 30–40cm apart so there’s enough space between shrubs. Mulch with organic matter to help it retain moisture.

Water once or twice a week until plants are mature.


2. How to propagate lavender

When propagating lavender, cut stems from your lavender plants after flowering (mid- to late summer). These are called hardwood cuttings, and have a better chance of surviving propagation.

After you prune lightly, take a stem or two – healthy, straight ones with good colour and no buds. Choose stems with soft growth at the tip and several leaf nodes.

Cut from the base, with a stem that’s at least 10cm long. You can dip the end in rooting hormone before planting.


3. How to grow lavender from a young plant

Planting lavender for garden decor with a woman in gloves.

You can also grow lavender from established plants. Start by digging a planting hole about twice as wide and just as deep as the root ball. Carefully lift the plant out of its container and untangle any roots that have curled or twisted.

Place the plant in the hole and backfill, firming the soil down in a raised ring. This helps direct water to where it’s needed.

Water once or twice a week to keep soil moist, and mulch away from the trunk.


Lavender Plant Care

Need some growing tips for your plants? Here’s a rundown on caring for lavender.


Watering

watering lavender flowers with water in watering can

Lavender is extremely drought tolerant once it’s mature, and can subsist on rain if grown outside. However, during hotter months, give it a good soak — but not too much, or you’ll get root rot!

  • How often to water lavender: While the plant is establishing itself, water when soil is starting to dry. Once your lavender has matured, though, you can get away with watering every two weeks (or just letting the rain take care of it). During summer and winter, you can water once a week.
  • How often to water lavender seeds: Once or twice a week until established.
  • How often to water lavender in pots or indoors: Once or twice every two weeks. Ensure the soil is moist all throughout but not waterlogged.


Pruning

Pruning lavender is essential to maintain its health and appearance, and help it withstand the elements and external stressors. It also encourages flowering and new branches, while preventing your plant from developing scraggly or woody growth.

It’s important not to go overboard pruning lavender, so you can keep your plants in the best condition. The general rule is to trim back the woody stems by one-third of their length after flowering.

You can also “deadhead” (aka clip faded blooms), which will encourage more flowers.

If you’re uncertain about trimming your plants, leave them in the hands of expert hedge trimmers! They’ll ensure your lavender will thrive – and the rest of your garden, too!


Mulching and fertiliser

Use organic matter to mulch the soil around your plants. This helps retain moisture, which means you won’t need to water as often.

Lavender doesn’t need fertilising, but you can boost its flowering with plant food during spring.


The post Growing Lavender In Australia appeared first on Lawn.com.au.

The Best Gardening Gloves In Australia 2022

Gardening is a fantastic passion to have! There’s no feeling quite like getting your hands in the dirt and soil as you work on your plants in the ground. But to maximise efficiency and protect yourself as you work, you’ll need the correct gardening accessories.

If you’re looking for the best gardening gloves Australia, we’ve done the hard work for you. We’ve listed a range of garden gloves, from thorn-proof hand covers to gloves for kids. And you don’t need to keep them to yourself – these gloves are great as gifts, too!

Take inspiration from the experts and protect your hands while you work. Check out the best gardening gloves available in Australia.

Best Lightweight Gardening Gloves

Hoselink makes more than just gardening equipment – they also make gardening accessories! And that includes their lightweight bamboo garden gloves. These gloves fit comfortably, with a latex dip on the palm for better grip.

Moreover, the bamboo liner is naturally anti-odour, and will keep your hands cool and dry despite all your work. These garden gloves are also hard-wearing and machine-washable, so you can conveniently rinse them off, then toss them in the laundry to clean.

Whether you need to plant pots or get your hands dirty, these eco-friendly, lightweight bamboo gloves are your best gardening friends.

Best Gardening Gloves for Thorns

“What every gardener needs” – especially when handling thorny plants! These thorn-proof long gardening gloves protect your hands from thorns and brambles. Their length ensures protection even for your forearms, so they’re excellent value.

The HANDLANDY Gardening Gloves provide extra protection with extra padding on the palm and fingers. But that doesn’t compromise your ability to work and handle tools, since these gloves are very flexible. Whether you need to prune, trim, or just do general garden work – these are the gloves you need.

Best Rubber Gardening Gloves

These rubber-coated gardening gloves come in packs of 12, but they’re very worth the money. The Showa Atlas Fit 300 are ergonomically designed to reduce hand fatigue, while allowing both wet and dry grip.

It’s important to note, though, that they’re not insulated – so they won’t keep your hands warm. But they’re lightweight with no irritating seams, meaning they’ll be comfortable to use for long periods of time.

If you want rubber gardening gloves for winter, Showa has the Atlas 452M-08 insulated gloves.

Best Leather Gardening Gloves

These leather garden gloves are tough but buttery soft, breathable but abrasive-resistant. Made of 100% deerskin, these gardening gloves maximise strength, durability, and flexibility. Plus, with an elastic wrist, they’ll fit most hand sizes!

The back of the glove has stretchable spandex material, so it’s windproof but comfortable. It also features a Neoprene Knuckle and Synthetic Leather fourchettes to protect your fingers from any hazards. These gloves are perfect for working – and the moisture-wicking means they won’t be uncomfortable even if you break a sweat!

Best Kids Gardening Gloves

Want your kids to help you in the garden? The Vgo Children Yard Work Gloves are perfect for smaller hands. Let your kids wear these while they’re seeding, digging, weeding, and picking.

Each glove is made of flexible seamless polyester in cute colours, perfect for young children. The gloves have a foam latex palm for a safe grip. Moreover, the knitting on the wrist wrap provides a secure fit while preventing dust and dirt from getting in.

Best Women’s Gardening Gloves

For great gardening gloves that are buttery soft while still providing maximum protection, choose the SKYDEER women’s gardening gloves. They’re made of deerskin suede that is comfortable and flexible, but still durable enough for garden work.

Each glove is flexible, with a waterproof nylon back and reinforced fingertips. This means your hands are safe from light rain and gardening hazards. Moreover, the gloves are designed to slip on and off easily, so they’re perfect whether you need to do some serious yard care or a quick pruning.

Best Men’s Gardening Gloves

Get your gardening on with these goatskin leather gloves! They have impact-rated, enhanced TPR to ensure maximum protection, alongside padded palms. But the gardening glove itself is made of soft goatskin for full comfort.

Don’t worry about your fingers even if you’re doing difficult garden jobs – these are ANSI Level 2 Rated and Cut Level 5 Rated. They’ll keep all sorts of hazards away from your skin while you work. And best of all, they’re easy to put on and take off.

Best Long Gardening Gloves

This pair of everyday gloves provides full protection even if you’re handling a cactus! The palm is made of full-grain, wear-resistant cowhide that will protect your hands while you do work. The gloves are resistant to thorns, needles, and bramble, so you can prune and handle plants without worry.

The elbow-length design features breathable pigskin that is scratch-resistant. This ensures even your forearms have protection! Plus, each glove has an adjustable cuff to keep debris and insects away from your hands, so no need to worry about stray ants on your fingers.

Best Floral Gardening Gloves

How much do you love flowers? These gardening gloves have a pretty floral design while still remaining functional and hard-wearing. They’re made of leather with a close-fitting, breathable structure that ensures comfort during long-term use. The gloves are also sweat-absorbent and abrasion-resistant.

Do you garden for long periods at a time? Worry not – these gloves are ergonomically designed, with an elastic wrist support. They’re great for all sorts of gardening work, from pruning to planting. And best of all, you’ll look stylish with the pattern of flowers and leaves to match your backyard!

Best Pink Gardening Gloves

Love the colour pink? This Spear & Jackson pair is light and bright while being suitable for gardening work. Dig up weeds or prune your plants with these breathable hand covers, which are ideal for general gardening tasks.

These gloves have nitrile-coated palms for a distinct grip while still being lightweight and machine-washable. You can reuse your pair over and over, whether for light duty or tough work. And they do come in other colours, but pink is the happiest.

Best Arthritis Gardening Gloves

Bionic ReliefGrip Gloves

Bionic ReliefGrip Gloves – Men’s and Women’s

From $55.76

Having arthritis and a green thumb makes a tricky combination. But with the right pair of gloves, you can do garden work to your heart’s content – without worrying about your hands or any pain.

The Bionic ReliefGrip line is designed by a professional orthopaedic surgeon, and it features a patented pad relief system. It also has LightPrene expanded wristbands for full support and the best fit, allowing you to work without concern for fatigue.

Moreover, the silicone fingertips provide durability and protection while affording you flexibility. Don’t let arthritis get in the way of your love for plants with the ReliefGrip Gloves!

Best Cheap Gardening Gloves

For those who don’t want to spend a fortune on garden gloves when they know they won’t be using them that often, here is your budget-friendly option (that’s still a great choice!).

Ozero’s utility work gloves are the perfect fit for the occasional gardener. They have many of the necessary features needed for light-duty gardening and pruning activities. What matters most is the glove protecting your skin while you work. This glove is even touch-screen-friendly too!

Best Outdoor Work Gloves

If you want safety gloves for outdoor work – including gardening – then the Milwaukee Level 1 Work Gloves are ideal. They have a breathable design that allows for maximum dexterity, but they’re also rated against tears, cuts, and punctures.

The blend of nylon and lycra provides all-day comfort while working. Additionally, the index finger SmartSwipe lets you access your mobile phone without removing your gardening gloves! Keep your hands safe even while using power tools through the protection of the Milwaukee Level 1 Work Gloves.

What are Gardening Gloves Made Of?

Gardening gloves are typically made of leather, rubber, fabric, or a combination of materials! It really depends on the pair you purchase. Many gardening gloves are made of deerskin or goatskin leather with rubber, latex, or nitrile coating around the palms, knuckles, and fingers. This helps protect your fingers and aid your grip while working.

Grow Better with Garden Gloves

Make garden work easier for yourself with the best gardening gloves Australia. They’ll provide all the protection you need, keeping your hands safe while you prune, mow, dig, and more! No matter what project you’re working on, gloves are a must for all gardeners.

Show your garden some (g)love while ensuring you’re well-protected with these great gardening gloves.

The post The Best Gardening Gloves In Australia 2022 appeared first on Lawn.com.au.

How To Aerate A Lawn

In the same way you deep clean your house in the springtime, your lawn could use a little TLC after a long winter. One important method to spruce up your lawn is by aerating it.


What is lawn aeration?

Lawn aeration helps your lawn breathe by making small holes in the soil. This process allows air, water and nutrients to reach the roots of your grass more easily. This is important because grass needs all those things to stay healthy and grow. There are two main types of lawn aeration.


Spike aeration

This type of vigorous lawn aeration involves repeatedly piercing the soil with metal spikes; however, it can damage your grass roots if done too often.


Core aeration

Close up of a mechanical lawn aerator.

This type of aeration involves removing small plugs of soil from the lawn. It is more labour-intensive than spike aeration, but it’s less likely to damage your lawn.


Why do you need to aerate your lawn?


Aeration can alleviate soil compaction

Over time, compacted soil can form on your lawn. This makes it difficult for air, water, and nutrients to reach the roots of your grass. Aerating helps break up compacted soil so your grass can breathe and thrive.


Aeration can reduce thatch buildup

aeration of lawn to prevent thatch build up

Thatch is a layer of dead grass, clippings, and other organic matter that can form on top of your lawn. While a small amount of thatch is normal, too much can prevent water and nutrients from reaching the roots of your grass.


Aeration can improve drainage

If water cannot drain properly from your lawn, it can lead to a host of problems like mould, mildew, and even turf diseases. Aerating improves drainage by creating holes in the ground that allow water to seep down to the roots of your grass. This helps ensure that your lawn stays healthy and free from disease.


Aeration can encourage turf growth

Aeration encourages healthy growth by increasing the amount of oxygen that reaches the roots of your grass. This means thicker, lusher grass that will be the envy of all your neighbours.


When to aerate your lawn

The frequency with which you should aerate your lawn depends on a few factors, such as the type of grass, soil type, and the amount of traffic on your lawn. The answer also depends on your climate, but most lawn care experts recommend aerating in early spring or late autumn.

Aerating your lawn in autumn will help to improve drainage, increase oxygen levels in the soil, and reduce compaction. As a result, your lawn will be healthier and better able to withstand the stresses of winter.


How often should you aerate your lawn?

lawn aeration

As a general rule of thumb, most types of grass need to be aerated once per year. For example, the best time to aerate warm-season grasses like bermuda grass is during the spring and autumn. In contrast, cool-season grasses like fescue should be aerated in the late summer or early autumn.


Do you need to aerate your entire lawn?

Although it may seem counterintuitive, certain parts of your lawn shouldn’t be aerated. Aeration is an important part of lawn care, but if you do it too often or in the wrong places, you could do more harm than good.

You should avoid aerating any area that is wet or saturated with water. When the ground is too wet, the holes made by the aerator will collapse as soon as they’re made. This can compact the soil and make it difficult for air and water to penetrate the roots. It’s best to wait until the ground is dry before aerating.

You should also avoid aerating slopes or hillsides. When you aerate on a slope, the holes made by the machine can cause erosion. If the soil is loose enough, it can wash away with each rainstorm or irrigation cycle. If you have a slope in your yard, it’s best to either hand-aerate with a garden fork or wait until the ground is dry enough to use a power aerator.


Signs your lawn needs to be aerated


Thatch layer

A layer of thatch is a clear sign that your lawn isn’t getting the nutrients it needs because of poor air circulation and soil compaction.


Unusual grass colour

lawn with thinning and different colour of grass

If your grass is thinning out, has patches of brown or yellow, or seems excessively compacted, your lawn may need to be aerated.


Leftover rain puddles

If puddles form on your lawn after a rainstorm, that is a clear sign of poor drainage in your soil. This can lead to drowning grass roots and pooling water that attracts pests.


How to aerate the lawn like a pro

What you’ll need:


1. Choose the right tool 

There are two main types of aerators:


Spike Aerator

This is great for small patches of lawn, and it’s easy to use. However, they can damage delicate turf, so the spike aerator is not ideal for large lawns.


Plug Aerator

This is more versatile and perfect for larger lawns. Plug aerators work by removing small soil plugs, which help to improve drainage and fix soil compaction.


2. Prepare your lawn 

cleaning lawn of debris

Remove any debris from your yard, such as sticks, stones, or leaves. You’ll also want to mark any sprinkler heads or other underground tubing so that you don’t damage them while aerating.


3. Mow your lawn 

You’ll want to mow your lawn short before you aerate your lawn. This will help the aerator do its job better and make it easier for you to see where you’ve already aerated. Be sure to set the lawn mower blade on high, so you don’t scalp your grass.


4. Water your lawn 

watering the lawn with a sprinkler

Giving your lawn a good soaking before you start aerating will make the process easier and help the new holes made by the aerator heal quickly. Watering will also make it easier for seed and lawn food to reach the grass roots once you’ve added it.


5. Aerate your lawn

Use your aerating tool to punch holes in the ground at evenly spaced intervals. For best results, aerate both the front and back of your lawn multiple times to break compacted soils. Keep in mind that not all parts of your lawn need to be aerated – don’t aerate wet areas, slopes, or hillsides.


6. Check the pH level

Before you reseed, use a pH testing kit to see whether your soil is in the ideal pH range. Soil pH affects the availability of nutrients for plants, and most plants prefer a slightly acidic soil with a pH between 6 and 7. Besides affecting plant growth, soil pH also plays a role in aeration. Soil that is too acidic or too alkaline can cause compaction.


7. Reseed and water your lawn

Reseeding lawns using seeds

After aerating the lawn, apply soil additives to revitalise your lawn’s appearance. You may use an all-purpose fertiliser or reseed it with grass seed. It’s also important to top dress your lawn at this point so that it will have the nutrients needed to thrive.


Your lawn needs air, water and nutrients – just like you!

A healthy lawn needs just as much spring cleaning as the inside of your home after winter. It’s tempting to grab a sturdy garden fork and stab away at your lawn, but that requires proper technique and is time-consuming. 

Ultimately, we recommend using a machine because this is a major lawn care operation. You can rent an aerator from most home improvement stores, or you can hire a professional lawn care company to do it for you.

Either way, make sure to aerate your lawn at least once a year to keep it looking its best.


The post How To Aerate A Lawn appeared first on Lawn.com.au.

How To Grow Spinach

Popeye was onto something when he ate spinach to become stronger. This leafy green is not only packed with nutrients, but it’s also easy to grow! In this blog post, we’ll show you how to get started with growing spinach in your own backyard.


Types of Spinach in Australia


Baby Spinach

As its name implies, baby spinach is a delicate, young variety of spinach with a slightly sweeter flavour than mature spinach leaves. It’s often used in salads or as a garnish, but it can also be cooked. Baby spinach is an excellent source of vitamins A and C, potassium, and folic acid.


English Spinach

English spinach

Also known as winter spinach, English spinach is a hardy variety that can withstand colder temperatures. It has dark green leaves with a slightly bitter taste. English spinach is rich in vitamins A and C and iron. It’s often used in soups or stews.


Malabar Spinach

Malabar spinach

Malabar spinach is a heat-loving vine plant that originated in India. It has bright green leaves and a mild flavour often used in curries and other Indian dishes. This variety of spinach is a good source of vitamins A and C, iron and calcium.


Savoy Spinach

Savoy spinach is easily recognisable by its crinkly leaves. It has a slightly sweet flavour and is rich in vitamins A and C, potassium and folic acid. Savoy spinach is often used in salads or stir-fries. 


Semi-savoy Spinach

The semi-savoy spinach is a leafy green vegetable characterised by its smoother, lighter green leaves than the savoy variety. The plants are relatively easy to grow and are often used in salads, stir-fries, and other dishes. Semi-savoy spinach is high in vitamins A and C, iron, and other minerals.


When to Plant Spinach

Spinach is a cool weather crop, which means it can be planted as early as two weeks before the last frost date in your area. So, the best time to plant spinach is 4-6 weeks before the last frost date in your area. If you sow too early, the plants will bolt (go to seed) when the weather gets warm; if you plant too late, the plants will be stunted by the cold weather.


Where to Plant Spinach

Spinach seedlings are being planted in a square foot garden lattice by a man

Spinach prefers full sun but will also do well in partial shade. When planting outdoors, make sure to choose an area of your garden that gets at least six hours of sunlight a day. A north-facing window should provide enough light for your plants if you’re growing indoors.


How to Prepare Soil for Spinach Plants

Before planting your spinach seeds, you need to ensure the soil is adequately prepared. 

  1. Till the soil to a depth of about 15cm. This will help loosen any compacted soil and allow the roots of your plants to spread more easily. 
  2. Add a layer of organic matter to the soil. This could be in the form of compost, manure, or peat moss. This will help improve drainage and aeration while also providing essential nutrients for your plants.
  3. Test the pH of the soil. Spinach plants prefer a slightly acidic environment, so you may need to add some lime to the soil if it is too alkaline.


The Best Ways to Grow Spinach


How to Plant Spinach Seeds

Spinach seeds are small, so they need to be planted shallowly — about 1cm deep. If you’re planting several seeds in one pot or section of your garden, space them about 5cm apart. Once the seeds have germinated and grown into seedlings, thin them out so that there is only one plant every 20cm.


Watering and Fertilising

Watering spinach on the farm

Spinach loves water and needs to be kept evenly moist throughout the growing season. Water your plants deeply about once a week, making sure the soil is moist but not soggy. To help your plants grow big and strong, fertilise them with a balanced fertiliser every two weeks.


How to Grow Spinach Outdoors

  1. Choose a sunny spot in your garden. Spinach prefers full sun but can also tolerate partial shade.
  2. Prepare the soil. Spinach grows best in rich, well-drained soil. Add compost or manure to your soil to improve drainage and nutrition.
  3. Sow spinach seeds. You can sow spinach seeds directly into the ground or start them indoors in seed trays. If starting indoors, sow the seeds about 6 weeks before the last frost date.
  4. Thin the seedlings. Once the seedlings have emerged, thin them out, so they are about 15cm apart. This will give them space to grow.
  5. Keep the plants well-watered. Spinach loves water and needs to be kept moist at all times. Water regularly, especially during hot weather.
  6. Harvest the spinach leaves when they are big enough to eat. You can start harvesting leaves as soon as they are big enough to eat (usually after about 8 weeks). Cut the leaves from the plant using garden shears. Leave enough leaves on the plant so that it can continue to grow.


How to Grow Spinach Indoors

Young seedling of spinach growing in pot on windowsill .

  1. Find a sunny spot. Spinach loves the sun, so it’s important to find a spot in your home that gets plenty of bright, natural light. If you don’t have a spot that gets full sun, partial sun will do just fine.
  2. Get some containers. You’ll need one or more containers that are at least 10 inches deep with drainage holes in the bottom.
  3. Fill the plant pots with potting mix. Once you’ve got your containers, it’s time to fill them up with a potting mix. Leave about 5cm of space at the top of the container so you can water it without making a mess.
  4. Plant your seeds. Spinach seeds are pretty small, so we recommend planting 3-5 seeds per pot. Once planted, lightly water them with a spray bottle and cover the pot with plastic wrap or a lid to create a mini greenhouse effect.
  5. Remove the cover once germination occurs. This usually takes 5-10 days. Once your seedlings have sprouted, remove the cover and place them in a sunny spot. Water them whenever the soil feels dry to the touch.
  6. Fertilise monthly. To keep your plants healthy and happy, fertilise them once a month with an all-purpose liquid fertiliser diluted to half-strength. 
  7. Harvest when ready. Your spinach is ready to harvest when the leaves are big enough to eat! Simply cut them off at the base of the plant using pruning shears.


How to Grow Spinach in Pots

  1. Choose a pot. Spinach grows best in well-draining soil. That’s why choosing a pot with drainage holes in the bottom is important. The size of the pot will also affect how well your spinach grows. A larger pot will give the roots more space to grow, which means your spinach will be healthier and more productive. 
  2. Prepare the soil. Once you’ve selected a pot, it’s time to prepare the soil. You can use store-bought potting mix or make your own by mixing equal parts sand, peat moss, and compost. Once you have your soil mixture, wet it until it is moist but not soggy. Then, fill your pot with the soil and gently firm it down with your hands.
  3. Plant the seeds. Spinach seeds are small, so it’s best to plant several at a time. Place the seeds on the surface of the soil and then lightly cover them with more soil. You don’t need to bury the seeds too deeply — just a light dusting of soil will do.
  4. Water regularly. Spinach needs lots of water to grow well. Keep the soil moist but not soggy. If the soil gets too dry, the leaves will wilt and the plant will go into shock. Water when the top inch of soil feels dry to the touch. Add water until it begins to drain from the bottom holes of the pot.
  5. Harvest. After about 4-6 weeks, your spinach plants will be ready for harvest. Cut each leaf about 2cm from the stem — you can either eat them immediately or store them in the fridge for later use.


How to Grow Baby Spinach

organic baby spinach growing in the garden.

  1. Choose a sunny spot in your garden. Baby spinach loves sunlight and will need at least 6 hours of sun per day.
  2. Prepare your soil by adding some compost or manure. This will help the spinach plants grow strong and healthy.
  3. Sow the spinach seeds about 1cm deep. Spinach seeds are tiny and need to be sown thinly in well-drained soil.
  4. Keep the soil moist but not waterlogged. Water the plants every day, especially during hot weather.
  5. Harvest the spinach leaves when they are big enough to eat. You can start picking baby spinach leaves as soon as they are 5-6cm long.


How to Propagate Spinach from Cuttings

Spinach is one of the easiest plants to regrow from cuttings. Simply take a few 7-10cm cuttings from the tips of your plants and place them in a jar or glass of water. Place the jar in a sunny spot and wait for the roots to develop. Once they have, you can transplant your cuttings into soil. With a bit of care, you’ll soon have a thriving crop of spinach to enjoy.


How to Harvest Spinach

Gardener's hands cut fresh spinach with a knife on a plantation

You can start harvesting baby spinach leaves as soon as they’re large enough to eat — typically when they’re about 7cm long. For full-sized leaves, wait until they’re about 15cm long. To harvest spinach, cut the leaves from the plant using scissors or a sharp knife. Be sure to leave at least 5cm of stem on the plant so it can continue growing.


How Long Does Spinach Take to Grow?

Spinach is a fast-growing crop, and under ideal conditions, it can be ready to harvest in as little as 30 days. Of course, not all gardens are created equal, and factors such as weather and soil type can affect the speed of growth.


Will Spinach Grow Back After Cutting?

As long as your spinach plants are well-watered, they will continue to produce new leaves throughout the growing season. New leaves will grow within a few days after harvesting and can be harvested again in about two weeks.


Spinach Companion Plants


Onions

Spinach and onion plants on a vegetable garden ground with other vegetables in the background

Onions are a great companion plant for spinach because they deter pests and improve the flavour of the leaves. We recommend planting onions about 15cm away from your spinach plants, so they have room to grow but are still close enough to be effective companions.


Beans

Beans are a great companion plant for spinach because they help improve the spinach plants’ growth. This plant also adds nitrogen to the soil, which helps to promote healthy leaf growth. When planting beans with spinach, be sure to plant them at the base of the spinach plants so that they can climb up the plants and support them as they grow.


Tomatoes

Tomatoes make excellent companion plants for spinach because they help to keep away harmful insects that can damage the leaves of the spinach plants. Tomatoes also produce a type of natural pesticide called lycopene, which can help to protect the spinach plants from disease. When planting tomatoes with spinach, give them plenty of space to spread out, so they don’t crowd the spinach plants.


Garlic

Garlic is another great companion plant for spinach because it helps keep harmful insects away. It also has antifungal properties that can help to protect the spinach plants from disease. When planting garlic with spinach, plant it near the edge of the garden so that its strong scent will deter pests such as possums from entering.


Common Issues and Diseases Affecting Spinach Plants

Like any other plant, spinach is susceptible to pests and diseases. These common problems can result in stunted growth and reduced yields. While there are many different pests and diseases that can affect spinach plants, here are the most common ones:


Leaf Spot

fungal leaf spot on spinach leaf

Leaf spot can cause the leaves of spinach plants to become discoloured and eventually drop off. To prevent leaf spot, it is important to water spinach plants at the base of the plant to avoid wetting the leaves. The foliage should also be kept dry, and infected leaves should be removed from the plant.


Downy Mildew

This fungal disease thrives in wet and humid conditions. Downy mildew causes yellowish spots on the top of spinach leaves, with a white or grey mould developing on the bottom of the leaf. To prevent this disease, water spinach plants at the base instead of from above.


Powdery Mildew

Powdery mildew is another fungal disease affecting many different plants, including spinach. This disease can be identified by a white powdery substance on the leaves of the plant. Good air circulation and avoiding overhead watering can help prevent powdery mildew.


Aphids

Aphids on spinach root.

Aphids are small insects that feed on plants by sucking out their sap. While they don’t usually cause serious damage to spinach plants, large infestations can stress the plant and make it more susceptible to other problems like diseases. To get rid of aphids, you can try spraying them off with water or using an insecticide designed for aphids. You can also encourage predators like ladybugs to eat them.


Spider Mites

Spider mites are tiny pests that feed on spinach plants by piercing their leaves and sucking out the sap. Infested leaves appear as small yellow or brown spots and may also be covered in webbing produced by the spider mites. The best way to control spider mites is to maintain high humidity levels around your spinach plants. You can also try using an insecticide designed for spider mites.


Cutworms

Cutworms are caterpillars that feed on plants, often causing serious damage to young seedlings. The best way to control cutworms is to handpick them off your plants (wear gardening gloves to protect your hands) and dispose of them far away from your garden since they will keep coming back if you leave them nearby. You can also use a chemical insecticide designed for caterpillars.


Spin’ch Me, I Must Be Dreaming of Leafy Greens

Spinach is a leafy green vegetable packed with nutrients. It is also one of the easiest vegetables to grow at home, even for gardeners with the brownest thumbs. But if you can’t seem to keep anything alive, don’t worry — our expert gardeners can help.

The post How To Grow Spinach appeared first on Lawn.com.au.

How To Grow Marigolds

Though they are not native to Australia, marigold flowers have become a popular addition to many gardens down under.

These vibrant flowers are known for their ability to deter pests, making them a popular choice for organic gardeners. In addition, marigolds are tolerant of poor soils and dry conditions, making them ideal for tropical climates.

If you’re thinking of adding marigold plants to your garden this year, here’s everything you need to know about growing them.


Marigold Symbolism

In many cultures, the marigold plant is associated with purity, healing, and protection. The flowers are often used in religious ceremonies and rites of passage, and their bright colours make them a popular choice for decorating homes and altars. 

In Hinduism, the marigold is a sacred flower that is often used in worship. It is believed to have the power to drive away evil spirits and protect the living from harm.

In Mexico, the marigold is known as the “flower of the dead,” and it plays an important role in the Day of the Dead celebrations. The flowers are used to decorate altars and graves, and they are thought to guide the souls of the dead back to their families.


Common Marigold Varieties in Australia

Australia is home to several different species of marigolds, including the Mexican marigold (Tagetes erecta, also known as the African marigold), French marigold (Tagetes patula), and signet marigold (Tagetes tenuifolia).

Each of these plants has its own unique bloom, ranging in colour from deep yellow to scorching orange.


Mexican Marigolds

Mexican marigolds

Mexican marigolds, also known as African marigolds (Tagetes erecta), are annuals that typically reach heights of around 60cm. They are native to Mexico but have been naturalised in many other parts of the world. 

The flowers can be orange, yellow, or red, and they typically bloom from summer to fall. Mexican marigolds are also known for being fairly drought-tolerant, which makes them a popular choice for landscaping in dry climates.


French Marigolds

French marigold

French marigolds (Tagetes patula) are annual flowering plants that typically reach a height of 30-60cm. They have bright green leaves and produce large, showy flowers in a variety of colours including yellow, orange, and red. 

French marigolds are native to Mexico and Central America, but they have been cultivated worldwide for centuries. They are tolerant of poor soil and adverse growing conditions, and they will bloom from spring until fall with proper deadheading.


Signet Marigolds

Signet Marigold

Signet marigolds (Tagetes tenuifolia) are annual flowers that are often used in gardens. They are easy to grow and tolerate a variety of soils and weather conditions. 

The flowers are small and daisy-like, with yellow or orange petals and a central disc. The leaves are lance-shaped and have a pungent, lemon-like scent. Signet marigolds self-seed readily, so they can often be found growing in areas where they have not been planted.


When to Plant Marigolds

The best time to plant marigolds in Australia is in spring or early summer. This will give the plants plenty of time to establish themselves before the hot summer sun arrives. Marigolds are not very frost-tolerant, so it is important to wait until the danger of frost has passed before planting them outdoors.


Where to Plant Marigolds

Marigolds are not fussy plants and will grow in most climates and soil types. When planting marigolds, it is important to choose a location that receives full sun. They will also need well-drained soil in order to thrive. Marigolds can be planted directly in the ground or started in pots and then transplanted later on.


Starting with Marigold Seeds vs. Marigold Transplants

You can grow marigolds from either seeds or transplants. If you choose to start with marigolds seeds, plant them indoors about 6-8 weeks before the last frost date. Marigold transplants can be planted outdoors after the last frost date has passed.


The Best Ways to Grow Marigolds

You’ll need:


Marigold seedlings in the small black pots with black soil


How to Plant Marigolds from Seeds Indoors

  1. Prepare your seed trays and sow your marigold seeds — Fill a planting tray with moistened seed-starting mix. Sow the seeds thinly on the surface of the mix and press them gently into the soil.
  2. Mist your marigold seeds and let them germinate — Lightly press the seeds into the mix, then mist them with water. Cover the tray with plastic wrap or a lid to create a humid environment for germination.
  3. Place your seed trays in a sunny spot indoors — Place the trays in a warm, sunny spot and keep the soil moist. The seeds should germinate within 7-10 days.
  4. Transplant into individual pots and continue caring for your plants — Once the marigold seedlings are 5-10cm tall, transplant them into their own pots filled with potting soil. Give them plenty of sunlight and water regularly to let the marigolds bloom.
  5. Deadhead marigold plants — To deadhead a marigold plant, simply snip off the flower at the base of the stem. You can also cut back the entire stem if necessary. As you deadhead, be sure to keep an eye out for any green buds, as these will bloom in the coming days.


Planting seedlings of flowers in the garden


How to Grow Marigolds from Seeds Outdoors

  1. Choose the right location — Marigolds need full sun in order to thrive, so choose a spot in your garden that gets plenty of sunlight throughout the day. Once you have found the perfect spot, it’s time to prepare the soil.
  2. Prepare your soil — Marigolds prefer well-drained soil that is high in organic matter with a pH between 6.0 and 7.5. If your soil is heavy or clay-like, you may need to amend it with some sand or compost before planting. You can also improve drainage by growing them on raised beds or mounds.
  3. Plant your marigold seeds — Marigold seeds are small, so it’s best to sow them indoors about 6-8 weeks before the last frost date. This will give them a head start on the growing season. Follow steps 1-4 of growing marigolds indoors — plant the seeds in trays, mist and wait for 7-10 days, but don’t stop there. You’ll need to harden off your seedlings to prepare them for outdoor planting.
  4. Harden off your marigolds — Hardening off is the process of slowly acclimating plants to the outdoors. To harden off marigolds, start by placing them in a sheltered spot outside for a few hours each day. Gradually increase the time they spend outdoors and protect them from strong winds and direct sunlight. After two weeks, your plants should be ready to withstand anything.
  5. Transplant your marigolds outdoors — Gently dig holes for each plant that are twice as wide as the root ball and barely deeper than the height of the pot. Carefully remove each seedling from its pot along with its roots and transplant it into one of the prepared holes in your garden. 
  6. Water regularly and carefully — Water each plant well after transplanting and monitor them for signs of stress such as wilting leaves or stunted growth. If necessary, provide additional water or shade as needed until they adjust to their new home in your garden.


How to Care for Marigolds

  • Water — Marigolds are pretty drought-tolerant and too much water can actually harm their development. When watering, make sure to give the soil a good soak so that the water reaches down to the roots where it’s needed most. Then, allow the top layer of soil to dry out completely before watering again.
  • Fertiliser — Marigolds are heavy feeders and will benefit from being fertilised every 2-3 weeks during the growing season. A balanced fertiliser like 10-10-10 or 20-20-20 is a good choice, or you can use an organic fertiliser such as compost tea.
  • Deadhead spent blooms — To encourage continuous blooming, be sure to remove spent flowers as soon as they fade. Cut the stem back to just above where it emerges from the foliage.


Marigolds Companion Planting

Marigolds make excellent companion plants because they release a compound called pyrethrin into the soil, which repels harmful pests like nematodes, whiteflies, and Mexican bean beetles. Here are some of the best plants to pair with marigolds for companion planting.


Tomatoes

Unripe cluster of green plum roma tomatoes growing in a permaculture style garden bed, with companion planting of marigold and calendula flowers

Tomatoes and marigolds are a classic combination. The strong scent of marigolds helps deter pests like aphids, whiteflies, and even rabbits from getting near your tomatoes.


Eggplants

Like tomatoes, eggplants are susceptible to aphids and whiteflies. Placing marigolds near eggplants will help keep these pesky insects at bay so your eggplants can thrive.


Capsicums

Marigolds also grow well with capsicums — both sweet capsicums and hot capsicums. The pyrethrin in marigold flowers will help protect your bell pepper plants from aphids, whiteflies, and even rabbits.


Potatoes

Potatoes growing in a Garden. In the Foreground you see some Marigolds

Marigolds are commonly planted with potatoes because they are known to be effective at deterring pests like Colorado potato beetles. These destructive pests can quickly decimate a potato crop, so having marigolds around can help reduce the amount of damage they cause.


Dandelions

Dandelions are rich in nutrients, including nitrogen, potassium, and calcium, improving soil quality as it grows. When grown alongside marigolds, dandelions can attract pollinators and also help to deter pests such as nematodes and slugs.


Fennels

Fennel is known for attracting beneficial insects, such as ladybugs and lacewings, which help to control pests. On the other hand, marigolds‌ are known for deterring harmful nematodes. As a result, planting these two flowers together can help to create a more balanced garden ecosystem.


Common Pests and Diseases Affecting Marigold Blooms

From rust to aphids, there are a number of problems that can plague your marigold plants. Keep reading to learn more about some common marigold pests and diseases, as well as how to prevent them.


Aphids

These small, winged insects suck the sap out of plants, causing marigolds to wilt and their leaves to yellow. To get rid of aphids, try spraying your plants with water or rubbing alcohol. You can also attract aphid-eating ladybugs to your garden by planting dandelions or fennel.


Thrips

Thrips are tiny, winged insects that feed on the leaves of marigolds, causing them to become discoloured and distorted. To control thrips, keep your garden clean and free of debris. You can also try spraying your plants with an insecticidal soap or neem oil solution (use the code LAWN10 for 10% off!).


Powdery Mildew

Powdery mildew is another fungal disease that affects the leaves of marigolds, causing them to appear covered in a white powdery substance. To prevent powdery mildew, space your plants well and water them at the base instead of from above. You can also treat powdery mildew with a fungicide designed for use on ornamentals.


Rust

Rust is a fungal disease that affects a variety of plants, including marigolds. It appears as orange or brown spots on the upper surfaces of leaves. To prevent rust from taking hold in your garden, be sure to remove any affected leaves as soon as you see them. You should also avoid watering your plants from overhead, as this can help spread the spores.


Leaf Spot

Leaf spot is a fungal disease that affects the leaves of marigolds, causing them to develop brown or black spots. To prevent leaf spot, space your plants well and water them early in the day so that the foliage has time to dry before nightfall.


Growing Marigolds FAQs


Benefits of Marigolds

beetle on a Marigold Flower

The benefits of marigolds are many and varied. In the garden, the scent of marigolds is dual purpose — it can attract bees and butterflies, and also repel insects, such as mosquitoes, moths and flies. Their roots also help to aerate the soil and their leaves add nutrients that help other plants grow healthily.


Are Marigolds Perennials?

Most gardeners will say yes and no. But the truth is marigolds are annuals — they complete their life cycle in just one growing season. This means they don’t need to be babied over the winter, and they will self-seed (meaning they’ll come back year after year with very little help from you). Their self-seeding characteristic makes them look like perennials.


Are Marigolds Annuals?

Yes. Marigolds are annuals in most growing zones. This means that they will die off at the end of the growing season and will need to be replanted the following spring.


I’m Feeling Marigolden, And So Can You

Now that you know everything there is to know about how to grow marigolds in Australia, it’s time to get out there and give it a try. And if you run into any problems along the way, our professional gardeners can help keep your flowers blooming throughout the year.

The post How To Grow Marigolds appeared first on Lawn.com.au.

How To Sharpen Lawn Mower Blades

One of the biggest challenges in maintaining a pristine lawn is mowing it. The warmer months mean it’s time to get each blade sharp and ready to shear those grass blades down.

Detaching your lawn mower blade will depend on your model (push mower or ride-on), but the methods for sharpening are similar. You can either clamp the blade in a vise, then file using a mill file, or work using a drill with a sharpening stone attached.

Ready for mowing season? Here’s how to sharpen lawn mower blades – after all, if you invest in the best quality lawn mower, you’re going to want to take care of it!


Why Sharpen Lawn Mower Blades?

You need to sharpen your mower blades to ensure a clean job when you cut grass. Dull blades will snag on the grass and rip it out, damaging your lawn. This will also put your lawn at risk of diseases like fungal infestation.

For the cleanest, most efficient cut while mowing, you’ll need to make sure your blades are sharp. And while you can always have the blades professionally sharpened, you can do a DIY job if you’re up to it! This is especially true if you use your mower as often as say, a professional lawn mowing service would.


Does Your Lawn Mower Blade Need Sharpening or Changing?

green lawn mower in the summer sun

Here’s a tricky question – do you just need to sharpen, or should you change your lawn mower blade entirely? To answer that, check your blade at the start of mowing season. If the edge is simply dull and flat, then you only need to sharpen it. It’s the same if you notice uneven patches or tears in the grass.

On the other hand, if there are nicks or cracks in the blade, then you can’t simply sharpen it to fix it. This is the same case if there are bends or warping. In this situation, you’re better off changing the blade out to a new one.


How Often to Sharpen Mower Blades

Ideally, once every other month. But always check the blade to see if it needs sharpening. If you mow very often, it may need filing more frequently.


Things To Know Before You Sharpen Your Lawn Mower Blade

Worker sharpening his blade lawn mower.

Do not aim for the sharpest blade possible – that’ll wear your blade too thin, causing it to perform inefficiently. You’ll also need to sharpen it more frequently to retain that razor-sharp edge.

Instead, aim for “butter knife sharp” so that your blade holds up longer.

Also, check what tool you’ll use to sharpen the lawnmower blades. There are two main tools you can use:


Which you use depends on your budget and what’s available to you.

Lastly, it’s not possible to sharpen a mower blade without removing it. Not only will you do an inefficient job, you might also hurt yourself in the process.


Sharpening Lawn Mower Blades

Always start by unplugging the spark plug and removing the spark plug wire. This means your mower won’t accidentally turn on and injure you while you’re working.

You should also use appropriate protective equipment, such as goggles and gloves.


Removing the mower blade

lawnmower in backyard grass

For a push mower, you’ll need to tip the mower onto its back or side. This will expose the underside of the mower, allowing you to access the retaining bolt securing the blade to the deck.

For a ride-on mower, lower the mower deck to its lowest setting so you can access the blade.

Use spray paint or a marker to note the correct orientation when reinserting the blade. The last thing you want is to install the blade upside-down – that’ll cause your mower to cut incorrectly.


How to sharpen lawn mower blades using a file

For those who don’t mow as often, or are trying to save money, the simplest tool you can use to get a sharp blade is a file.

1. Clamp the blade and check the angle

Insert the blade into a vise and clamp it to hold it in place. Check for the proper filing angle and move in one direction only, pushing across the top side of the cutting edge.

2. Start filing

Take a 25cm (10in) mill bastard file and start running it along the sharp edge of the blade. Move in one direction and ensure you’re feeling the “cutting” action. Otherwise, your blade might be dull.

3. Test the balance

Use a balancer to check if the blade is properly balanced. An improperly balanced blade will cause damage to your mower in the long run.

4. Reinstall the blade

Reinsert the blade and tighten the main bolt. Ensure there’s no wobbling or looseness before reusing the mower.


How to sharpen lawn mower blades using a drill sharpener

lawn mower blade sharpening

There’s a heightened risk when using a drill sharpener due to the higher heat and speed involved. However, it’ll get the job done faster with less effort.

1. Clamp the blade and prep the drill

Again, secure the blade with a vise to prevent it from moving.

Attach the sharpening stone attachment to your drill.

2. Insert the cutting edge

Insert the cutting edge between the plastic guide and the stone. The guide should rest against the rear of the cutting edge.

3. Sharpen the blade

Activate the drill and run the sharpening attachment along the correct side of the blade. Work until it’s sharpened. Then move to the other side.

It’s essential that you sharpen the same amount on each side so that the blade is balanced.

4. Test the balance

Use a blade balancer or a nail to test the balance of the blade. If one side lifts, file a bit more off the other side to even it out.

5. Reinstall the blade

Reinsert the blade into the deck and tighten the bolt.


Why Check a Mower Blade’s Balance?

Simple – an unbalanced blade will result in a poor cut. It’ll cause excessive vibrations and wobbling while mowing, which can damage the motor by causing undue stress. You could also cause damage to the mower deck.


Maintain Your Lawn with Sharp Lawn Mower Blades

Nobody wants a patchy lawn with ripped-up grass, so ensure you know how to sharpen lawn mower blades so they’re ready to slice through grass cleanly. This way, you can maintain a pristine lawn that you’re proud to show off to neighbours, visitors, and even yourself – no reason you can’t pat yourself on the back for your hard work!


The post How To Sharpen Lawn Mower Blades appeared first on Lawn.com.au.

How To Grow Potatoes In Australia

Growing potatoes at home is a great way to have a never-ending supply of fresh potatoes. They are versatile vegetables that can be used in many ways, from mashed potato, to roasted potato, to fried potato chips.

The best thing about growing your own potatoes is that you know exactly what has gone into them, so you can be sure they are free from harmful pesticides and chemicals. If you want to learn how to grow potatoes in Australia, then read on for some tips.


Types of Potatoes in Australia

Few vegetables are as versatile or delicious as the humble potato. But with so many Australian potato varieties to choose from, it can be a challenge to know which to grow. The following are the three main types of potatoes grown in Australia:


1. Waxy Potatoes

Waxy potatoes have a lower starch content and are good for salads and steaming. These potatoes have a smooth, velvety texture.


Desiree Potatoes

Desiree potatoes dug from the soil

Named after Napoleon’s Empress Josephine de Beauharnais, Desiree potatoes are one of the most popular varieties grown in Australia. Desiree potatoes have light red skin with creamy white flesh and a slightly floury texture, making them ideal for mashing, baking, roasting, and chips.


Dutch Cream Potatoes

Dutch Cream potatoes are one of the oldest varieties grown in Australia and were first brought over by European settlers in the 19th century. They have creamy yellow flesh with a distinctively nutty flavour and a smooth, waxy texture that makes them perfect for boiling, roasting, or steaming.


Nicola Potatoes

Nicola potatoes

Nicola potatoes are a recent addition to the Australian potato scene, having only been introduced in 2003. They have a nutty flavour and a delicate, waxy texture that makes them ideal for boiling or steaming whole and serving with butter or sour cream.


2. Starchy Potatoes

Starchy potatoes have a higher starch content and are good for baking, mashing, and frying.


Russet Burbank Potatoes

One of the most popular potato varieties in Australia, Russet Burbank potatoes are perfect for baking, roasting or frying. They have light brown skin and firm flesh that breaks down when cooked, making them ideal for mashed potatoes.


Red Pontiac Potatoes

Red Pontiac potatoes are oval-shaped with red skin and white flesh. They’re relatively small and have a slightly waxy texture. When boiled, red Pontiac potatoes keep their shape and have a nice, firm texture that makes them perfect for salads or potato salad recipes.


King Edward Potatoes

King Edward potatoes

Named after King Edward VII, who was the King of England at the time they were developed. These potatoes are red-skinned with white flesh. They have a firm texture and a slightly sweet flavour and are often used for boiled or mashed potatoes.


3. All-Purpose Potatoes

All-purpose potatoes are somewhere in between waxy and starchy potatoes and can be used for most cooking methods. They have a medium starch content, which means they’ll keep their shape when boiled or roasted but will also mash well.


Royal Blue Potatoes

royal blue potatoes

As their name suggests, Royal Blue potatoes have deep blue skins with starchy white flesh. They’re a waxy variety of potato that is often used in salads or boiled and served whole with butter.


Sebago Potatoes

Sebago potatoes are large spuds with light brown skin and white flesh. They’re good all-rounders that can be used for any type of cooking, but they’re particularly good roasted or baked.


Yukon Gold Potatoes

Yukon Gold potatoes are an American import that’s become extremely popular Down Under thanks to their delicious buttery flavour and smooth texture. Yukon Golds have golden skin with yellow flesh and are perfect for mashing or roasting.


How Long Do Potatoes Take to Grow?

Potato plants take between 90 and 120 days to mature. But this can vary depending on the type of potato and the growing conditions. For example, early varieties of potatoes may be ready to harvest in as little as 60 days, while late varieties can take up to 150 days. In addition, potatoes grown in cooler climates may take longer to mature than those grown in warmer climates.


When to Plant Potatoes

fresh potatoes in the field

Potatoes need a cool climate to thrive. In Australia, potatoes are usually planted in late spring or early summer, when the weather is warm and there is little risk of frost.

If you live in an area with a tropical climate, it’s best to choose a potato variety that is tolerant of high temperatures. For example, cool climate varieties like Royal Red-skinned waxy potatoes are best suited for growing in Tasmania’s cooler climate. On the other hand, tropical climate varieties like Desiree red-skinned potatoes are best suited for growing in Queensland’s warmer climate.


How to Plant Potatoes


Seed Potatoes vs Potato Seeds

When it comes to planting potatoes, you have two options: potato seeds or seed potatoes. Seed potatoes are the tubers or shoots you see growing out of potatoes. Potato seeds are the small, undeveloped potato eyes you can find on a whole potato. 

While there are some pros to potato seeds:

  • Potato seeds are much cheaper than seed potatoes.
  • Potato seeds take up less space than seed potatoes and are more efficient to store.
  • Potato seeds germinate faster than seed potatoes, which means you can get a head start on the growing season. 

There are also a few drawbacks to planting them. For one thing, they are more challenging to plant than seed potatoes. Additionally, they have a lower survival rate, so you may need to plant more seeds than you would if you were using seed potatoes. Ultimately, the best option for you will depend on your budget, space constraints, and level of experience.


How to Grow Potatoes Outdoors

Close up of a potato field with sky and clouds


What You’ll Need

To get started, you’ll need the following:

  • Seed potatoes or potato seeds
  • Hand trowel or spade
  • Compost or manure
  • Container for growing potato seeds
  • A sunny spot in your garden


Step 1: Check the Last Frost Date

You should plant your seed potatoes about two weeks before the last frost date in your area. If you are unsure when this is, you can check with your local nursery or gardening store.


Step 2: Prepare the Soil for Planting

Potatoes need well-drained soil that is rich in organic matter. So, it is important to add compost or manure to the soil before planting. The ideal pH level for growing potatoes is between 6 and 7. So, you may need to add some lime to the soil if it is too acidic. When preparing the soil, it is also necessary to ensure that it is free from stones, as these can damage the roots of the potato plants.


Step 3: Plant Your Seeds

To plant your seed potatoes, dig holes that are about 10cm deep and 15cm apart. Place one seed potato into each hole and then cover them with 5cm of soil.


Step 4: Water Regularly 

watering the rows of growing bushes of potatoes in the vegetable field

Potatoes need to be kept moist but not waterlogged. I recommend watering them once a week during the growing season. Be sure to give them a good soaking so that the water penetrates down to the roots. Mulch around the plants with hay or straw to help keep the moisture in and reduce evaporation.


Step 5: Thin Your Sprouts

After about two weeks, you should see shoots starting to appear above ground level — these are called ‘sprouts’ or ‘eyes’. Once sprouts appear, thin out each plant so that there is only one main shoot per plant remaining. Thinning out allows each plant enough room to grow without competing with other plants for nutrients and space.


Step 6: Feed Your Potato Plants

About six weeks after planting, your potato plants will start to flower. At this point, you should start feeding them with a high-potassium fertiliser (tomato feed is ideal). Apply according to the supplier’s instructions and stop feeding once the flowers have started to fade.


Step 7: Harvest Your Potatoes

Farmers hands with freshly harvested potato

You can start harvesting potatoes when the leaves start to turn yellow and die back. Use a garden fork to dig up your spuds, being careful not to damage any of the tubers. Once harvested, allow your potatoes to dry out in the sun for a few hours before storing them in hessian bags in a cool, dark place.


How to Grow Potatoes Indoors

While we typically think of potatoes as an outdoor crop, they can be quite easy to grow indoors. Here’s everything you need to know about indoor potato growing.


What You’ll Need

To grow potatoes indoors, you’ll need the following supplies:

  • Seed potatoes or potato seeds
  • Potting mix
  • Compost or manure
  • Hand trowel or spade
  • Fertiliser
  • Watering can or spray bottle
  • 30-40 Litre plant pots — make sure they have drainage holes


Step 1: Select and Purchase Potato Seeds

You’ll want to select a potato variety that is well suited for indoor growth. Some good options include Yukon Golds, Russets, and Red Pontiacs. Avoid varieties that are labelled “outdoor” or “field.” Once you’ve selected your potato variety, it’s time to purchase your seed potatoes. You can find these at most garden centres or online.


Step 2: Prepare Your Potting Soil

Potatoes need nutrient-rich soil in order to thrive. If you’re using a store-bought potting mix, be sure to mix in some organic matter like compost or manure before planting. If you’re making your own potting mix, use two parts peat moss or coir fibre to one part perlite or sand. Your goal is to create a light, fluffy mixture that will drain well but still keep some moisture.


Step 3: Plant the Potato Seeds

Once your potting soil is ready, fill your plant pot to within 15cm of the rim. Sink three to five of your potato seeds into the soil and then cover them with 5cm of potting mix. Make sure to space them evenly apart.


Step 4: Keep the Soil Moist but Not Soggy 

potatoes growing indoors

One of the most important things to remember when growing potatoes indoors is to keep the soil moist but not soggy. Too much water will cause the potatoes to rot; too little water will cause them to shrivel up and die. Aim for keeping the soil evenly moist by watering once a day — twice a day if the weather is particularly hot or dry.


Step 5: Feed and Fertilise

Your potato plants also need to be fertilised regularly — once a week should suffice. Use a diluted liquid fertiliser and apply it using a watering can or spray bottle. Be careful not to over-fertilise, as this can damage the plants.


Step 6: Wait for Them to Grow

It will take about 2-3 months for your potatoes to be ready to harvest. When they’re ready, you’ll know because the leaves will begin to turn yellow and die back. At this point, stop watering and fertilising the plants. Let them sit for another week or two before harvesting your delicious home-grown potatoes.


How to Grow Potatoes in Tyres

You don’t need a lot of space to grow your own potatoes. In fact, all you need is an old car tyre and some soil. Here’s how:

  • Step 1: First, find an old tyre (or two, or three…) and clean it out. Make sure no nails or sharp objects inside could hurt your potatoes.
  • Step 2: Start by filling the tyre with topsoil and compost, leaving about 10cm at the top. 
  • Step 3: Plant two or three potato seeds in the soil. Cover them with at least 10cm of topsoil.
  • Step 4: Water the soil regularly, and don’t get tyred waiting for the potato plants to grow.
  • Step 5: Once the plants are around 10cm tall, mound up more potting mix around the base of each plant. Keep doing this until the tyre is filled to the top with soil.
  • Step 6: Add another tyre, and continue watering and adding soil until the tyres are full. This will give the potatoes plenty of room to grow.
  • Step 7: Once your potatoes are mature (usually after about two months), they’ll be ready to harvest. Just reach into the tyre and carefully pull out any that looks big enough to eat.


When to Harvest Potatoes

flowering potato bushes

The best time to harvest potatoes is after the plants have flowered and the potato skins have started to toughen. This usually occurs about 2-3 months after planting. 

To check if the potatoes are ready, carefully dig up one plant and check the size and condition of the tubers. If they are small and still soft, leave them in the ground for a few more weeks. Once they have been harvested, store them in a cool, dark place until you are ready to use them.


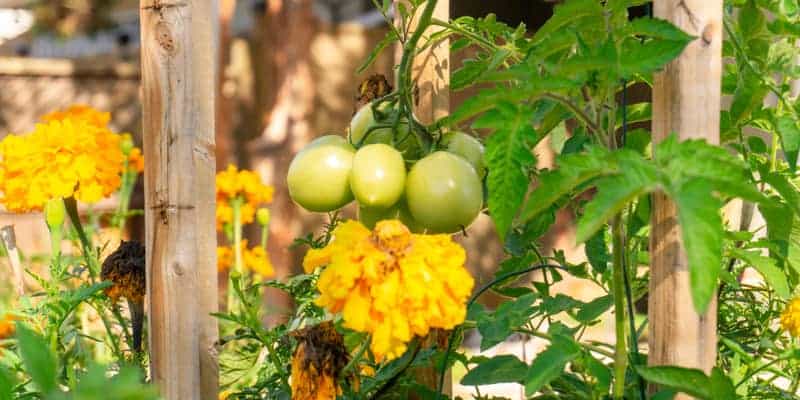
Potato Companion Plants

Potatoes are known to support the growth of other plants, especially those in the nightshade family. Some of the best plants to grow with potatoes include tomatoes, capsicums, and eggplants. Not only will these vegetables benefit from the nutrients that potatoes provide, but they will also help to keep potato pests at bay.


Carrots

Carrots and potatoes are often planted together since they have similar growing schedules and prefer similar conditions. Plus, they make a great team in the kitchen! Try roasting them together for a delicious and healthy side dish.


Beans

beans

Beans are another great companion plant for potatoes. They can help support the potato plants as they grow, and they also add some nitrogen to the soil, which is beneficial for both plants.


Onions

Onions and potatoes are often planted together since they tend to do well in similar conditions. They also make a delicious pairing in many recipes, so if you’re looking to add some extra flavour to your potato dishes, consider adding onions to the mix.


Cucumbers

Cucumbers are another great option for growing with potatoes. They prefer similar growing conditions and will benefit from the nutrients that potatoes provide.


Corn

field with corn and potato plants

Corn and potatoes make a fantastic team, as they both benefit from each other’s shade. Additionally, cornstalks can be used to support potato plants, helping to keep them from toppling over.


Peas

Peas are another excellent choice for growing with potatoes. Like beans, they add nitrogen to the soil and also help to support potato plants. Peas also have the added benefit of deterring insect pests that might otherwise damage the potato crop.


Garlic

Garlic plants share the same growing requirements as potatoes, so they can be easily managed with a single fertilisation and irrigation schedule. When planted next to potatoes, garlic can help to deter pests and improve the flavour of your spuds.
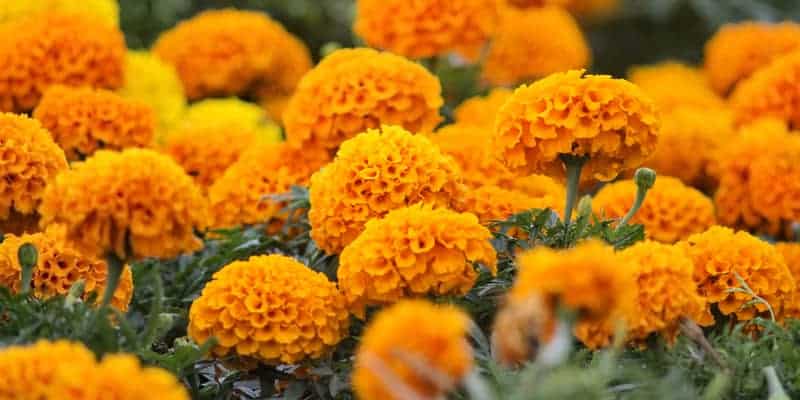
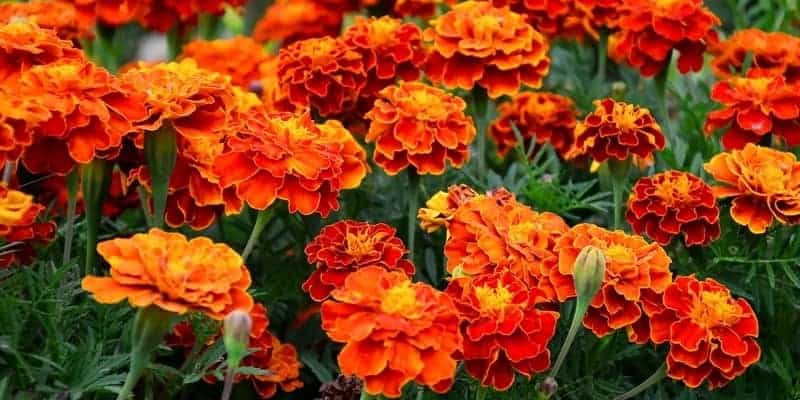
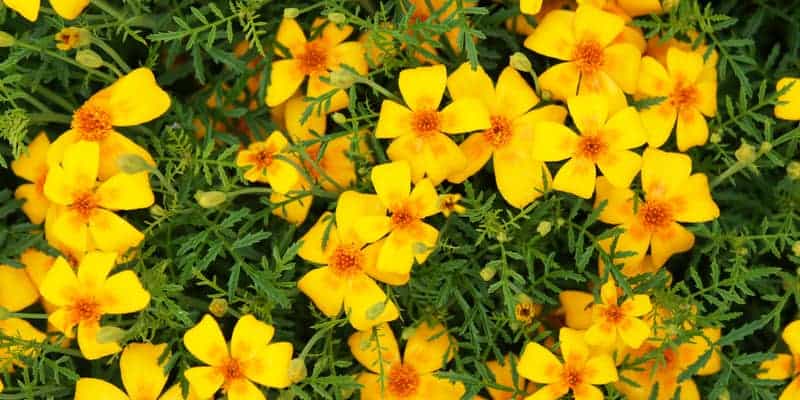
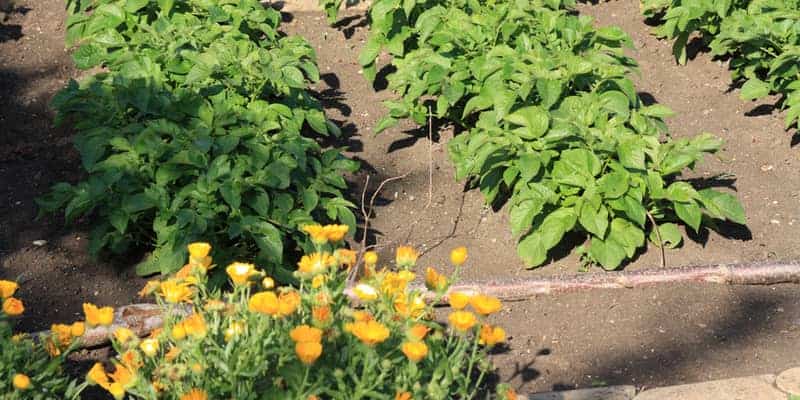
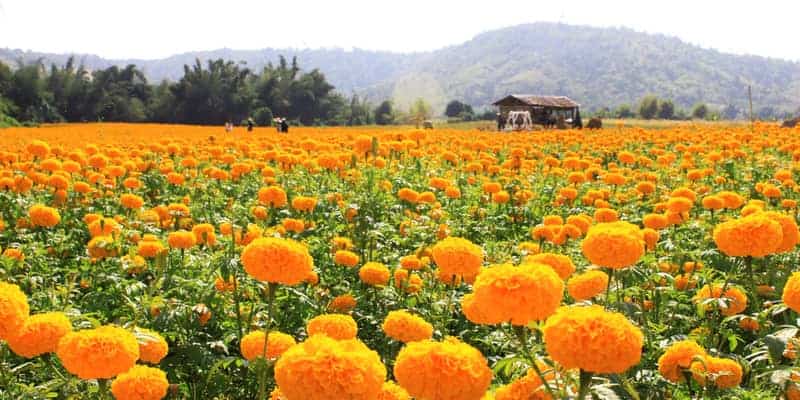
 

Marigolds

Marigolds release a compound called pyrethrin into the soil, which is harmful to many common garden pests such as nematodes, aphids, and whiteflies. This can help to protect potatoes from these pests, and also improve the health of the overall soil.


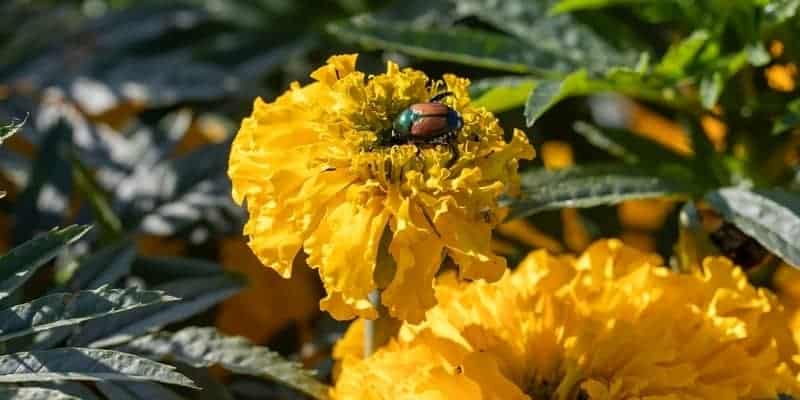
Common Pests and Diseases that Affect Potato Plants

Just like any other plant, potato plants can be affected by pests and diseases. In Australia, some of the most common problems include aphids, cutworms, and Colorado potato beetles.


Aphids

These tiny insects feed on plant sap and can cause stunted growth and distorted leaves. One common method to get rid of aphids is to blast them with water from a hose. Another option is to spray a homemade insecticide using dish soap and water. For persistent infestations, you may need to resort to chemical insecticides.


Colorado Potato Beetles

Colorado potato beetles

These black and yellow beetles feed on potato leaves, causing extensive damage, and their larvae can also bore into potato tubers. To get rid of Colorado potato beetles, you can use insecticidal soap or organic neem oil which will kill the beetles on contact. (We suggest Plant Doctor’s neem oil plant spray – use the code LAWN10 for 10% off!) You can also opt to release beneficial predators, such as ladybugs, into your garden.


Early Blight 

Early blight is a fungal infection that spreads via wind and water, and it thrives in warm, humid conditions. To get rid of early blight, it is important to remove any infected leaves or stems from the plant. The affected area should then be treated with a fungicide. After treating the plant, continue to monitor it for signs of early blight.


Late Blight

potato late blight disease symptom on plant leaf

Late blight is a serious disease that can devastate potato crops. The symptoms are easy to spot: dark brown or black spots on the leaves, stems, and fruit of the plant. To help prevent late blight, avoid planting potatoes in areas that have had previous outbreaks of the disease. You should also water the plants carefully to avoid getting the leaves wet, as this can allow the fungus to spread. Remove any affected leaves or plants immediately to keep the disease from spreading further.


Fusarium Wilt

Fusarium wilt is a destructive disease that can affect potatoes, tomatoes, and other plants in the nightshade family. The fungus enters the plant through the roots and then spreads through the vascular system, causing the leaves to wilt and turn brown. There are several ways to deal with fusarium wilt, but the simplest is to remove affected plants and burn them.


Potato psyllid

The potato psyllid is a small, winged insect that feeds on potato plants. While most potato psyllids are harmless, some can carry a disease called “zebra chip”, which can cause potatoes to develop dark stripes. Psyllids also produce a sticky substance called honeydew, which can encourage the growth of sooty mould on the leaves. One of the most effective methods is to remove infested leaves from the plant. Another method is to spray the plants with an insecticide.


Po-Tay-Toes, Boil ‘em, Mash ‘em, Stick ‘em In Your Garden

With a bit of effort, you can enjoy freshly harvested potatoes all year round. Just be sure to choose the right variety for your climate and feed your plants with a high-potassium fertiliser once they start flowering. And if you ever need an extra pair of hands, we have professional gardeners who can help.

The post How To Grow Potatoes In Australia appeared first on Lawn.com.au.

How To Change Lawn Mower Blades

Have you noticed that your lawn mower isn’t as efficient as it used to be? Maybe it’s not cutting grass as well, or it’s ripping out chunks instead of slicing through them. Or perhaps you’ve accidentally hit something and caused damage to your mower blade.

Now, you could opt to sharpen your lawn mower blade, but that’s not always the best solution. At some point, the blade of your lawn mower will be dulled beyond repair, or maybe cracks or holes will occur.

To replace a lawn mower blade, you’ll first need to shut off the mower and/or disconnect the spark plug. Remove the main bolt and each blade bolt. Then take your replacement mower blade kit and replace the old blades with new blades.

When you’re mowing your own lawn, you’ll need to keep your blades sharp and intact. Learn how to change lawn mower blades to maintain your mower properly.


Why Change Blades on Lawn Mowers?

Simply put – to cut grass properly and efficiently. Dull or damaged blades won’t trim grass well (if they can cut at all). They might also cause damage to your mower by straining the engine, using up more fuel, and possibly overheating the equipment.

Even the best lawn mowers will have their blades wear down over time. So ensure you not only sharpen your blades, but change them regularly too!


Lawn mower in the garden


Should I Sharpen or Replace Lawn Mower Blades?

Check the condition of your blade to determine whether it needs to be sharpened or changed. Tilt your mower back flat or lower the mower deck. Ensure there’s no petrol or oil flowing towards the blades, or that could cause a bigger problem!

Inspect the blades for any:

  • Cracks
  • Bends or warping
  • Holes
  • Excessive thinness

If any of these are the case, then you’ll need a new blade. Excessive vibration, running over obstacles, and general wear and tear can all cause damage.

Otherwise, if the metal is still thick and there’s no visible damage, all you’ll need to do is sharpen them.

Most lawn mower blades are easy enough to fix so long as you’re careful about safety. Changing the old blade yourself will also help you save money. But if you’re apprehensive about switching out your blade, take your equipment to your local mower shop.

(Pro Tip: It’s a good idea to get your mower maintained once a year, just so a professional can inspect the whole machine and make sure it’s in good nick!)


How to Change a Lawn Mower Blade

Always start by turning off your mower and disconnecting your spark plug wire. Wear protective gloves while working – blades are sharp!

You can also opt to empty the petrol tank, especially for ride-on mowers.


Things to check before changing blades

Check your manufacturer’s specs if there are specific instructions for changing mower blades. Most blades follow the same instructions, but you may need to check the specs for hardware or special styles. 

Before you begin, look at the:

  • Style of blade
  • Size of bolts
  • Thread of bolts

Note that the thread of the bolt will determine the direction in which you turn it. Traditional bolts turn left to loosen, right to tighten – but reverse-thread bolts go the opposite way. Check the kind of thread first!


man changing lawn mower blades


Changing push mower blades

It’s pretty straightforward to change push mower blades. Once you’ve prepped your garden tool, get started.

  1. Remove the retaining bolt. You can use any old socket wrench that’s the right size. Be mindful that the blade doesn’t drop while you do this!
  2. Take out the old blade. It should come right off once the retaining bolt has been unscrewed.
  3. Replace with a new blade. Check that it’s in the correct position – there should be a guide or instructions to follow.
  4. Re-tighten the retaining bolt. Screw it back on, ensuring the blade doesn’t move or wobble.
  5. Reset your mower. Stand it back up and replace any fuel you syphoned out. If you need to use it immediately, reattach the spark plug or restart the engine. Let it run for a bit to ensure the blade is spinning correctly – then you’re good to go!


Changing ride-on mower blades

ride on mower

For a ride-on mower, you’ll need a different way to access the blade mounting hardware in order to change the blades.

  1. Drop the mower deck. Set it so that it’s at its lowest possible point.
  2. Take out the deck. You’ll need to disengage the belts and release the belt.
  3. Unscrew all bolts. Take a correctly-sized wrench and loosen the bolts and brackets. Lay them out in an organised manner so you can replace them all when you’re done.
  4. Remove the mower deck. Once all the connections are unscrewed and the blade cable has been disengaged, the mower deck should slide out.
  5. Change the blades as you would a push mower. Unscrew the retaining bolts, take out the old blade, and put in a new one.
  6. Reconnect the mower deck. Re-tighten the bolts and brackets to reconnect the deck to the mower. Set the deck back to the appropriate setting and you’re done!


Maintaining a Lawn Mower

Take it from the lawn experts – knowing how to change lawn mower blades is an essential skill for lawn owners. Your mower’s blades play a key role in cutting grass efficiently and maintaining the lawn’s appearance. Otherwise, you’ll have a garden tool that cuts unevenly – or even rips out chunks of your lawn and ruins your hard work!

The post How To Change Lawn Mower Blades appeared first on Lawn.com.au.

Philodendron Silver Sword Care Guide

There is a low-key philodendron variety that is secondary to none in elegance: the Philodendron Silver Sword. As its name suggests, this Philodendron variety has slender silver-toned leaves shaped like a sword. If it’s understated sophistication you’re after, there’s no better plant for you than the Philodendron Silver Sword. 

Learn more about this lovely low-maintenance variety with our comprehensive care guide below.


An overview of the Silver Sword Philodendron

The Philodendron Hastatum, or the Silver Sword Philodendron as it is commonly called, is an attractive vining plant with bluish-silver lance-like leaves. Younger Philodendron Hastatum foliage has a more pronounced silver colour and sword shape — as the plant grows, it takes on a greener colour and a more arrowhead-like form.

Philodendron Silver Swords have a peculiar growth cycle. These Philodendrons start off as terrestrial plants. As they continue to grow, they shed their hemiepiphytic nature and become full-fledged aerial plants. The Silver Sword Philodendron is an Aroid plant and exhibits qualities similar to those in this plant group.

Silver Swords are fast growers. When given structural support to climb onto, these plants grow quicker and develop larger leaves. A hanging Philodendron Silver Sword is equally beautiful because of its trailing habit. Just place your Philodendrons in hanging baskets to fully capture their dramatic foliage. With the right conditions, a Silver Sword Philodendron can reach a height of 1m.


Philodendron Silver Sword care

Philodendron Hastatum care is a no-brainer — it can easily be done by anyone. Like its other Philodendron cousins, the Silver Sword Philodendron belongs to the Araceae family, which means it thrives in similar environmental conditions.

The Silver Sword enjoys bright indirect sunlight, moist and well-drained soil, and moderate to high humidity. Water your houseplant regularly to keep the soil moist, but avoid water logging as this causes root rot. 


Bright light

The Philodendron Silver Sword can handle a wide range of light requirements. You may see your Philodendron Hastatum look less robust when placed in areas with lower light levels, but it will still survive.

It fares best when allowed to soak in bright, indirect sunlight, however. Your plant will have vital-looking foliage and vivacious growth when placed near a window with indirect sun streaming in. A leggy stem or two can be a sign of inadequate lighting.

What the Philodendron Silver Sword cannot survive from is prolonged exposure to direct sunlight. The light and high temperature from the sun’s rays can scorch the foliage of your plant and cause permanent damage.


Loose, well draining soil

As one of the aroid plants, the Silver Sword Philodendron thrives in loose, well-drained soil. A mixture of coco coir, perlite, and organic matter (earthworm castings work well!) is the ideal soil combination for a Silver Sword. For better drainage, use pots with holes to allow excess water to drain off.

Make the most out of your potted Silver Sword Philodendrons by placing them in hanging baskets. This tropical plant will exhibit a graceful trailing form that any plant lover will go crazy over.

Recommended: Philodendron Super Soil

Planthood Philodendron Super Soil

Planthood Potting Mix

Designed exactly with your philodendron’s origins in mind, Planthood’s barky mix mimics the origins of these tree-huggers which thrive on aerial roots and attach on other trees for support. Get ready for your plant to grow wild!


Watering

Among the Philodendron varieties, this moisture-loving type is one of the few that can withstand a little overwatering here and there. Maintain your plant’s hydration by having a regular watering schedule. You’ll know it’s time for a dose of TLC when the top layer of the soil feels dry.


Moderate to high humidity levels

Because Philodendrons’ natural habitat is a tropical rainforest, it’s only fitting that they seek a similar environment. A humidity level of 75% will ensure a plump Philodendron Silver Sword houseplant.

No worries if your home tends to have cool, dry air. You can still recreate the humid conditions of a South American rainforest for your plant. Gardening professionals suggest the following tricks for making the environment conducive for your Silver Sword Philodendron:


Misting

Drooping leaves can be a sign of low humidity in your plant’s surrounding area. During dry weather, give your plant a light spray to help increase hydration.


Pebble tray

To build a pebble tray, simply put some pebbles and water on a dish. Make sure the surface is flat so that your potted plant remains stable. Place your Philodendron Silver Sword on the pebble tray and watch it plump back up again.


Clustering Philodendrons together

There’s strength in numbers! During dry weather, gather the Philodendrons in your home and place them in one area. This mimics the environment in a rainforest and optimises the humidity produced from the plants’ foliage. Grouping houseplants together also achieves a fuller, lusher look for your Philodendrons.


Placing it in the bathroom

Low humidity? No problem! Make your bathroom your Philodendron Silver Sword’s new home — your plant will grow comfortably there because of the high humidity level. The instant beautifying effect of having the gorgeous Silver Sword in your bathroom is an added bonus.


Temperature

Average room temperature is the ideal range for your Philodendron Hastatum. Between 150-260C, your plant will grow steadily and be free from plant stress. Extremely low or high temperatures, however, may push a Silver Sword past its resilient limits, and cause permanent damage.


Fertilising

Fertilising is to Philodendrons as taking supplements is to humans — they’re not necessarily a need. That is, until you start developing a deficiency and find yourself physically weaker. 

As a general rule of thumb, it is recommended to fertilise your Silver Sword Philodendron monthly during spring and summer. These are the growth months of your houseplant. Your Philodendron will benefit greatly from a nutritional boost during these seasons.


Pruning

Prune a Philodendron Silver Sword to manage its size and appearance. Remove sick or brown leaves as well — these consume much-needed nutrients intended for healthier parts of the plant.


Philodendron Silver Sword propagation

As with other Philodendrons, the Philodendron Hastatum can be easily grown from stem cuttings. Spread some silvery foliage love by propagating this variety at home with these easy steps:


Step 1. Pick a healthy Philodendron Hastatum plant

Start your Philodendron Hastatum propagation by picking a healthy base plant. Well-nourished, disease-free Philodendrons produce healthier cuttings. This translates to more robust foliage and a healthy root system for your new plant.

You’ll want to avoid base plants that have a sick stem or leaf, as these Philodendrons have a weaker resistance to disease and infestation.


Step 2. Locate where the nodes are

The next step in the propagation process is to identify where the nodes are. Nodes are the brown knobs on a Philodendron’s stem and have the potential to develop into roots.

Pick a stem with a few nodes near the end where you’ll make your cut — this will help you propagate your cutting successfully.


Step 3. Cut below the node

Using clean, sharp scissors, make a cut below the node in one swift motion. Avoid multiple cuts to prevent causing any distress to your plant.


Step 4. Place your stem cutting in water

As soon as you have successfully made your cuttings, place them in a jar filled with clean water. Make sure to replace the water from time to time to prevent bacterial growth. Allow the roots to grow out — this usually takes about a few weeks or so.


Step 5. Transfer the stem cutting to a planting site

When the roots are a few centimetres long, transfer the cuttings to a pot or garden plot and watch your plants grow! 


The post Philodendron Silver Sword Care Guide appeared first on Lawn.com.au.